Chocolate Strawberry Shortcakes

Chocolate Strawbery Shortcakes

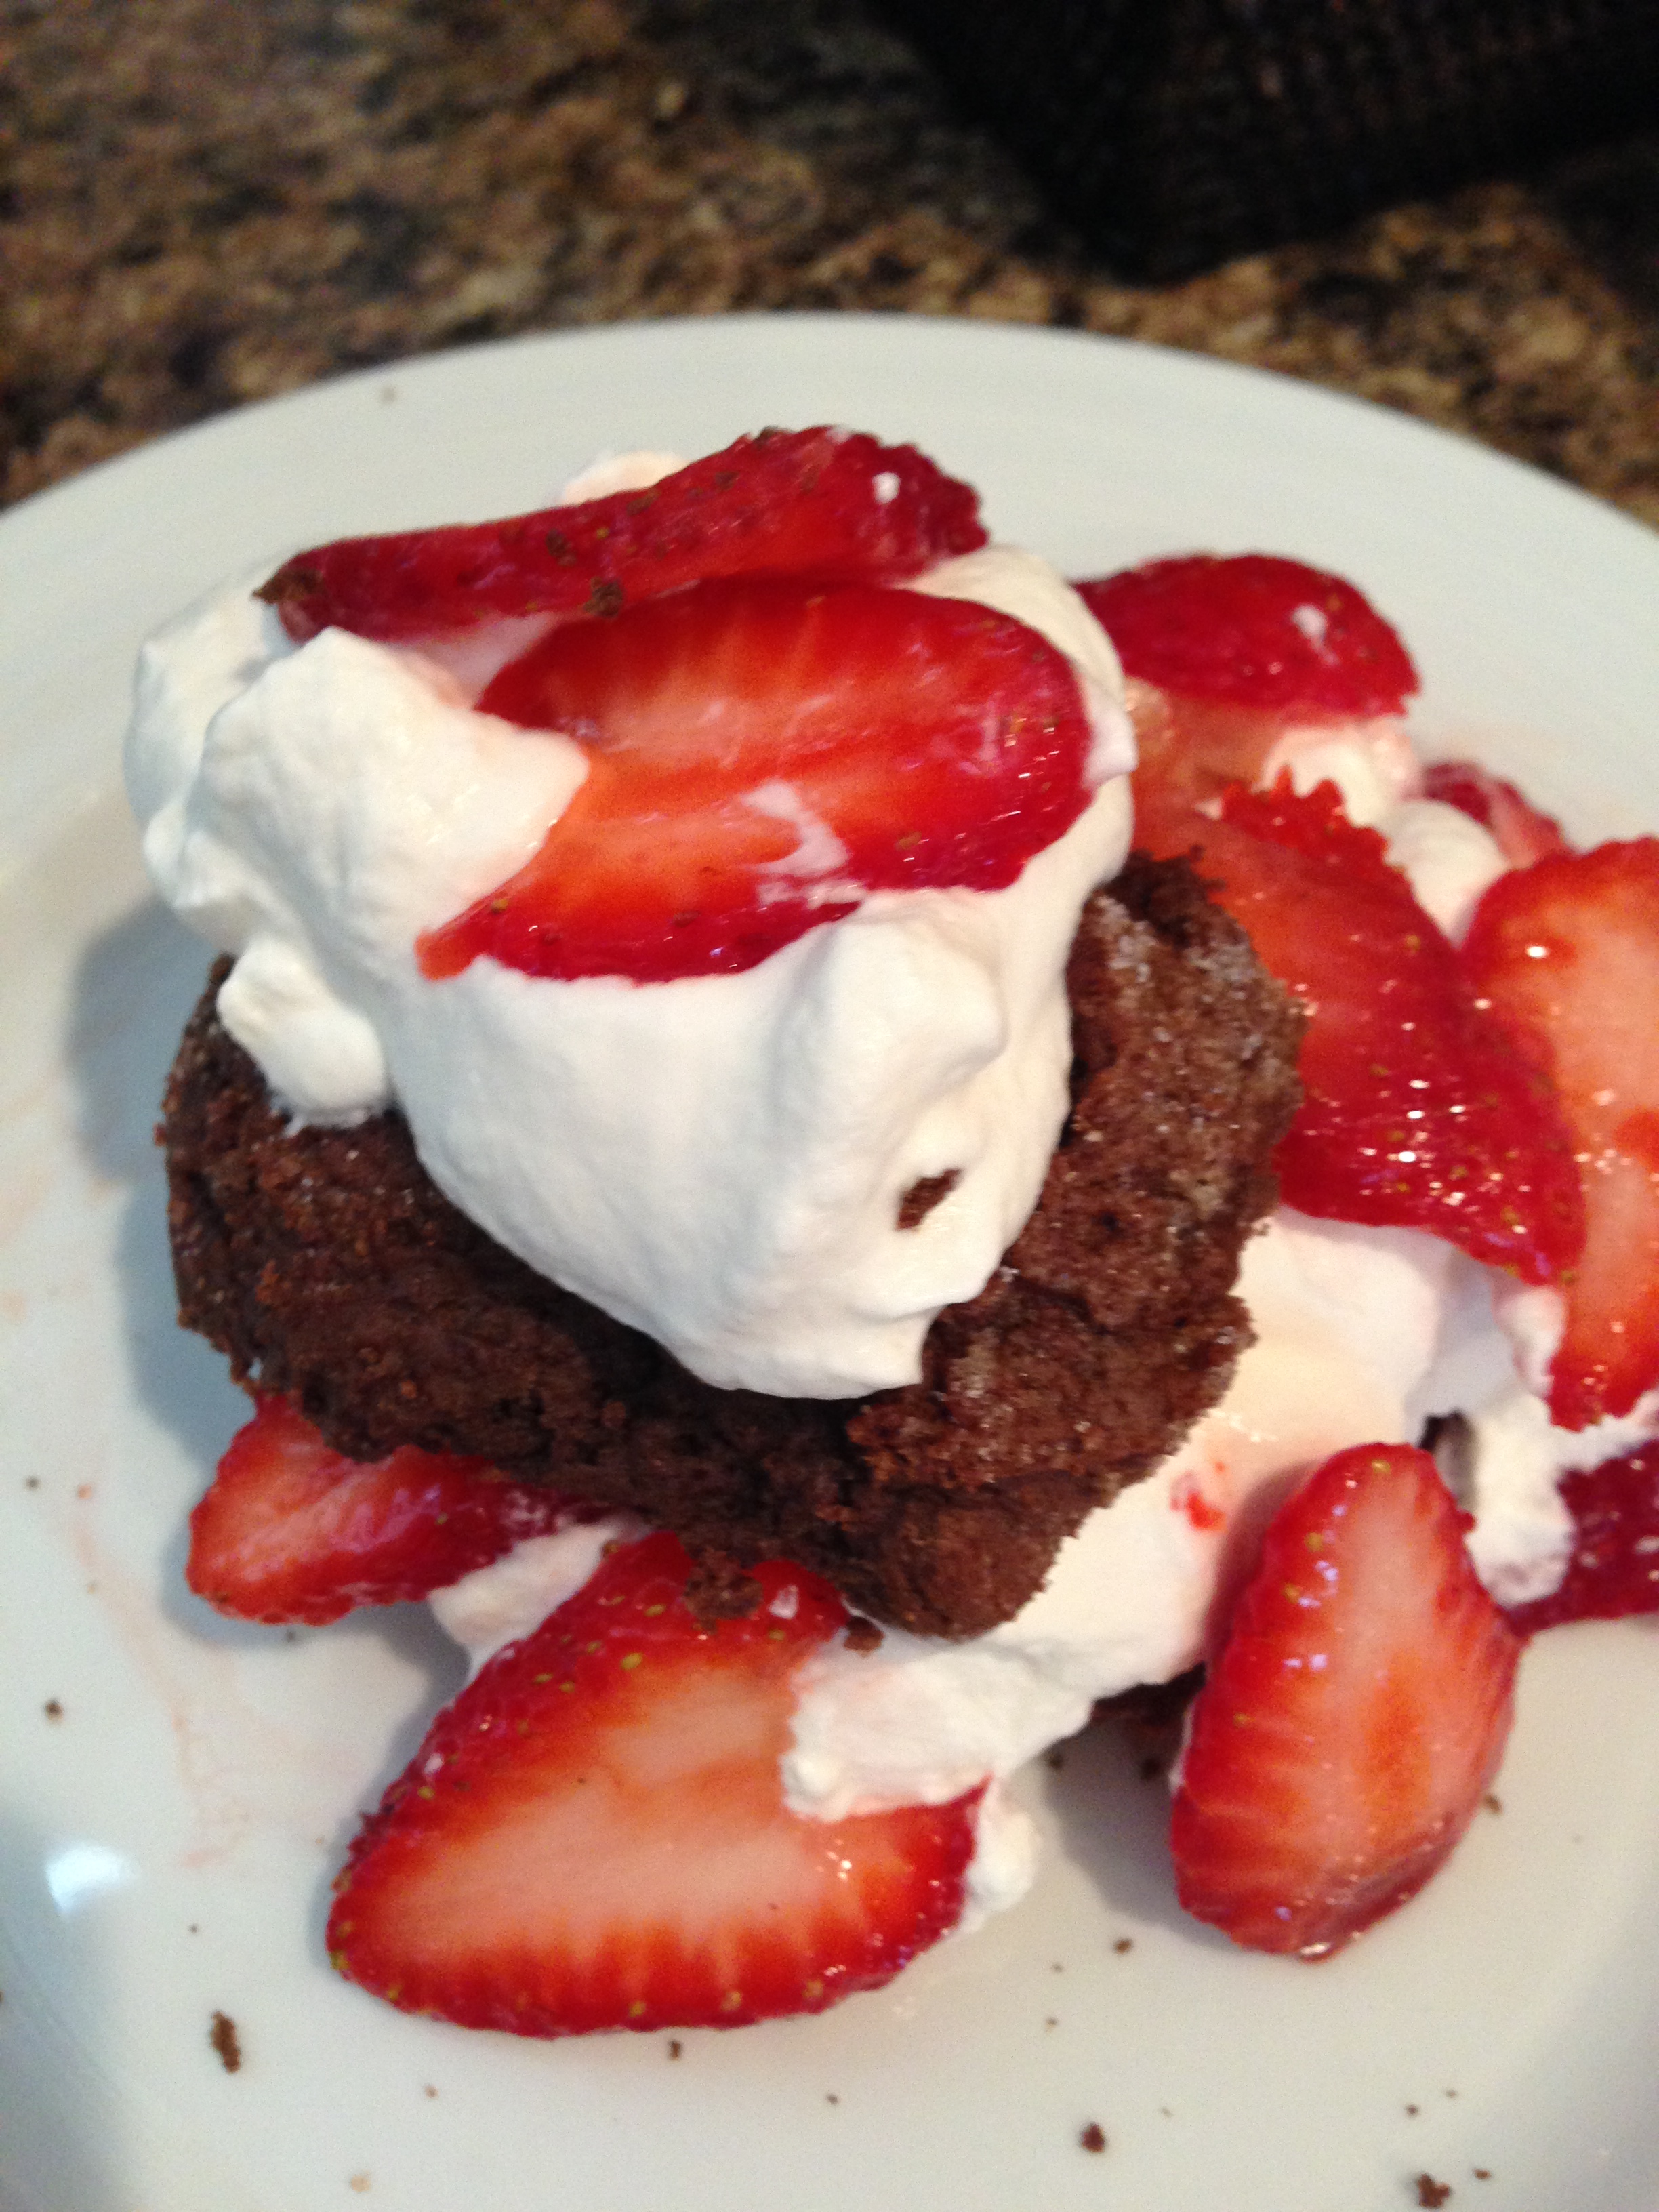
Because really, what is the one thing that Strawberry Shortcakes are missing?  Chocolate!  We went to a dear friend’s baby blessing yesterday with a luncheon before and so I of course volunteered to make treats.  These were perfect, summery and light and yummy, just the right amount of chocolate.  The recipe comes from “My Recipes”.  I doubled the recipe and made them a little smaller (1/4 cup scoops instead of the 1/3 cup called for) and ended up with about 16 cakes.

1/4 cup unsweetened cocoa powder

1 cup flour

1 1/2 teaspoons baking powder

1/2 teaspoon baking soda

1/4 teaspoon salt

1/2 cup plus 2 tablespoons sugar plus extra for sprinkling

4 tablespoons cold unsalted butter, cut into small pieces

5 tablespoons milk

4 cups (about 16 oz) strawberries, stemmed and sliced (about 3 1/2 cups sliced)

2/3 cup heavy cream

1  Preheat oven to 425.  Line baking sheet with parchment paper.  Sift cocoa, flour, baking powder, baking soda, salt and 1/4 cup sugar into large bowl.  Add butter and rub in with fingertips until mixture resembles coarse meal.  (I used my pastry cutter.)

2  Stir in milk until a rough dough forms.  (I had to add almost double the amount of milk to get it to stick together.)  Do not overmix.  Divide dough into 4 equal portions (a heaping 1/3 cup each).  Gently shape into mounds and sprinkle tops with sugar.  Transfer to baking sheet and bake until toothpick inserted in center comes out clean, 12 – 14 minutes.  Transfer biscuits to wire rack to cool.

3  Toss strawberries and 1/4 cup sugar in bowl.  (I just served the strawberries without sugar.)  Let stand a room temperature, stirring occasionally, until juices form, about 30 minutes.  Using a hand mixer on high, whip cream and 2 tablespoons sugar in large bowl until soft peaks form.  (Or use my recipe for whipping cream found here.)

4  Using a serrated knife, slice each biscuit in half horizontally and place 1 bottom half on each of 4 plates.  Spoon 1/4 berry mixture on each bottom.  Dollop with whipped cream and top with remaining biscuit halves.  (I put another dollop of cream on top and then a few more berries on top of that.)

Grilled Corn on the Cob

Grilled Corn on the Cob

I think this might be the way that we eat corn on the cob from now on.  I decided to experiment on the 4th by grilling the corn.  I brushed them with butter and lightly salted and peppered them and then wrapped them in foil.  Bob put them on the grill on low to medium for about 15 – 20 minutes then took them off and we let them sit for a little bit before opening.  They were awesome, cooked but slightly crunchy which is how I like them.  Give it a try, couldn’t be any easier!

Oreo Truffle Flag

Oreo Truffle Flag

Happy day after the 4th of July!  Yesterday I made this Oreo Truffle Flag for the fam in celebration of Independence Day, I think it came out so cute!  And it tasted even better.  The inspiration came from Betty Crocker, but I decided to go with Oreo Truffles instead of cake balls, recipe for the truffles found here.  I made a batch of Oreo Truffles using Mint Oreos but ended up being a bit short of enough to make the flag so I made a few more truffles using Lemon Oreos and some homemade frosting that I had in the fridge.  I have to admit that I liked the lemon truffles better than the Mint ones.  After making the truffles, I dipped 12 of them in Wilton blue candy melts (and then sprinkled them with little round sprinkles to represent the stars), 28 truffles in red and then 23 in white.  It was really pretty easy, just a bit time consuming.  So Happy 4th of July one day late!

No Bake Eclair Cake

No Bake Eclair Cake

The Young Women were over for a swim party this week and I got to make some treats for them so I decided to try another no bake dessert and this one is amazing!  It’s so easy that when I was making it, I was pretty sure that it wasn’t going to be that good but it was delicious and really did taste like an eclair.  The recipe comes from “Six Sisters’ Stuff” and is another that I would recommend if you are in need of a quick, easy, no bake summer treat.

cake

1 (14 oz) box graham crackers

2 (3.4 oz each) boxes french vanilla instant pudding

3 1/2 cups milk

1 (8 oz) tub of Cool Whip

1  Mix pudding and milk in bowl and blend for about 2 minutes then fold in Cool Whip.

2  Spray 9 x 13″ pan with cooking spray.  Place a layer of whole graham crackers on bottom of pan then top with 1/2 the pudding.

3  Cover pudding with another layer of graham crackers, top with remaining pudding and then another layer of graham crackers.  Make frosting (see below) and spread carefully over graham crackers.

4  Chill over night or at least 8 hours.

frosting

3 tablespoons unsweetened baking cocoa

1 1/2 cups powdered sugar

3 tablespoons butter, softened

3 tablespoons warm milk

Mix all ingredients until smooth.  Add more sugar to  make frosting thicker or more milk to make it thinner, if needed.

BLT Grilled Pizza

BLT Grilled Pizza

For Father’s Day we got the hubs this pizza oven that you put on top of your barbeque.  It sounded like a great idea since he loves to grill and we all love pizza.  Sounded like a great idea but didn’t turn out quite so well, at least not the first time around.  We’re hoping it has a learning curve and that we’ll figure it out otherwise it’s going back.  This pizza looks great but the underside is very well done to say the least.  We all love BLTs so I thought we’d turn it into a pizza, if the bottom hadn’t burned, it would have been awesome.

pizza dough, of your choice (I use the pizza dough from Winco that you can buy in their deli section for like $1.50)

shredded mozzarella cheese

shredded Parmesan cheese

bacon, crumbled

lettuce, chopped

tomatoes chopped

1  Roll out pizza dough into large circle, around 12″.  Top with desired amount of mozzarella and Parmesan cheeses.  Cook as desired, in oven, on grill, in pizza oven on grill, whatever way works best for you.

2  Top with bacon, lettuce and tomato.  Enjoy!

Lemon Cookie Frozen Yogurt

Lemon Cookie Frozen Yogurt

Bob and I strolled into William Sonoma the other day because, as you might imagine, it’s a store that I like to browse through on occasion.  We were looking at a display of ice cream and frozen yogurt starters,

Lemon Cookie Frozen Yogurt

when the lady behind the counter asked us if we’d like to sample the Lemon Cookie Frozen Yogurt that she had just made.  What a silly question, of course!  OH MY GOSH!  Best frozen yogurt I have ever tasted so of course, we bought a can of the starter.  It’s not cheap at $12.95 a can (cheaper than a trip to Yogurtland though!) but it comes with 2 packets of starter mix and 2 packets of cookie bits and they each make 1 quart, all you have to add is milk and yogurt.  I mixed mine up with my Kitchen Aid in my ice cream bowl attachment, couldn’t have been any easier.  So if you are in the market for some homemade ice cream or frozen yogurt this summer, you might want to check it out.

Caramel Mud Pie Cups

Caramel Mud Pie Cups

It’s not a picnic (or any meal really) around here without dessert so here is our dessert from the Young Women picnic and it was so tasty!  It comes from a blog called “Inside BruCrew Life”; it was easy to put together so if you need a quick, no bake treat this summer, you might want to give this a try.  She made them inside cute little mason jars but I found these little plastic cups at the dollar store and figured they were perfect for a picnic since they could be tossed after using.

3/4 cup crushed pretzels

4 tablespoons butter, melted

1/2 tablespoon sugar

1 (8 oz) package cream cheese, softened

3/4 cup powdered sugar

1/4 cup caramel ice cream topping

3/4 cup Cool Whip

1 (3.4 oz) chocolate pudding

1 1/3 cups milk

1  Stir together pretzels, butter and sugar.  Spoon into 8 small jars or dishes.

2  Beat cream cheese and sugar until creamy.  Add caramel and beat again.  Fold in Cool Whip.  Spoon into jars over crust.

3  Combine pudding mix and milk and whisk for 2 minutes.  Spoon evenly over cream cheese layer.  Refrigerate.

4  Top with more Cool Whip before serving, if desired.

I topped mine with a dollop of Cool Whip and then some Pampered Chef Sweet Caramel Sprinkles. Here’s a side view so you can see all the layers:

Caramel Mud Pie Cups

Cucumber Ranch Turkey Wraps

Cucumber Ranch Turkey Wraps

And some more food from our picnic, these were yummy and also cute!  The recipe comes from a blog called “Taste and Tell”.  I mixed them up a bit using both turkey and ham and I also added cheese to some.  And I wrapped them in parchment paper strips and tied them with some baker’s twine – pink for ham and blue for turkey so they could easily choose which one they wanted.

4 oz cream cheese, softened

1 teaspoon ranch seasoning

4 (8″) flour tortillas

3/4 cup diced cucumbers

1/4 pound deli turkey

1  Mix cream cheese and ranch dressing together until well blended.

2  Lay out the tortillas.  Spread each with the cream cheese mixture.  Top with cucumber followed by turkey.  Roll tortilla and slice in half.

(I wrapped the tortilla in the parchment and tied each end with twine before cutting, it was much easier than wrapping after cutting and it kept the wraps together nicely.)

Individual 7 Layer Dips and Chips

Individual 7 Layer Dips and Chips

More food from our Young Women picnic.  I’ve seen this idea over and over on Pinterest so decided that this picnic was the perfect time to try them both out.  For the individual chip bags, I took some brown paper lunch sacks and chopped the tops off with my craft scissors so that they had fun borders, then I stamped a sunshine onto each bag just for fun and filled them with tortilla chips so everyone had their own mini bag of chips.  For the individual 7 layer dips, I took some clear plastic drinking cups and layered refried beans, sour cream, salsa and cheese (so really only 4 layer dips but with teenage girls you never know what they’re going to like so I kept it simple).  The next time I do this, I think I’ll include a spoon with each cup of dip so that you can get down to the bottom without breaking all of your tortilla chips while trying.  These were yummy and fun and easy to eat.

Strawberry Lemonade

Strawberry Lemonade

We were going to take the Young Women up in the canyon for a picnic last night but the wind started blowing and then the rain started falling so we decided to just picnic in my backyard.  I got a little carried away with the picnic as I am likely to do when food is involved and I am in charge of it so it’s probably just as well that we ate on the deck because transporting all of this might have been a bit of a challenge.  The idea for this lemonade comes from a blog called “My Frugal Adventures” and while it was a pretty easy recipe, I decided to make it even easier and a little cheaper too what with the price of lemons currently.  I’ll give you her original recipe then tell you what I did.

strawberries, 8 medium or 10 small

1/2 cup – 1 cup sugar

2 tablespoons sugar

6 – 7 cups water

2 cups fresh squeezed lemon juice (about 8 lemons)

1  Squeeze lemons to get 2 cups juice.

2  Add strawberries to blender and puree for a few seconds.  Add 2 tablespoons sugar and 1 cup water.  Blend until it comes down to a nice juice.

3  Add strawberries to lemon juice then add sugar in amount to your liking and then add 5 – 6 cups water.

4  Chill well.

Here’s my version:

2 cans frozen lemonade concentrate

16 oz package fresh strawberries

1  Mix lemonade according to package directions.

2  Pulse strawberries in blender until they are liquid.

3  Add strawberries to lemonade and chill well.

Delicious!  The girls drank almost the whole gallon.