I was making up some little incentives for the girls at church who have been working on some goals and I remembered my chocolate mustache mold and figured what teenage girl wouldn’t enjoy a good chocolate mustache so I pulled it out and made some chocolate mustaches and then went online and found this little gem to go along with them (from a website called “LeFunny.Net”). My daughter Courtney didn’t get it but I thought I was pretty funny! 🙂 (One bag of Wilton candy melts gave me about 12 mustaches and then I dipped pretzels and animal crackers in the leftover chocolate, yum!)
Tea Cakes
Can’t have a tea party without tea cakes so here are mine! I wanted a cake recipe that was a little denser so I googled and found this one on the eHOw website which worked out well and tasted great. I had a couple of pans that made small cakes and I wanted to make sure that they held their shape and didn’t crumble apart when I tried to take them out of the pan and also that could stand up to the frosting. Sometimes cupcakes/small cakes right from the box are a little too crumbly.
box cake mix
1/2 cup whole milk or water
1/3 cup oil
4 eggs
small box instant pudding mix, in a flavor that compliments your cake mix
1 Preheat oven to 350. Grease cake pan.
2 Combine cake mix and pudding mix in mixer bowl. Add milk, oil and eggs and beat per cake box directions. Blend until mixture is smooth and has no lumps. The batter will be thicker than most box cake mixes at this point.
3 Pour batter into prepared pan and spread/smooth with spatula.
4 Bake according to package directions.
I used some of the my favorite buttercream icing to frost these guys. I added some food color and then melted it in the microwave so that I could drizzle it over the cakes.
Here are a couple of picture from the tea party of the treat tray
and the party table
Marshmallow Teacup
Here is the second edible teacup for the Tea Party. I found this idea on Pinterest but only the picture, no instructions as the picture didn’t lead anywhere. You can go look at the picture on Pinterest. The picture is of a pink teacup but pink didn’t really go with my color scheme which ended up being blue and green so I did mine in white.
for each teacup you will need:
round sugar or shortbread cookie (I used the same Hy-Top sugar cookie from Winco that I used for the other teacup)
cookie icing (comes in a pouch, Betty Crocker Cookie Icing)
large marshmallow
regular size lifesaver
small cookie (I used a Keebler fudge stripe cookie from a 100 calorie package)
multi colored sprinkles
decorator icing (I used my tube of white Betty Crocker Decorator Icing)
1 Take the small cookie and cover the chocolate side with the white decorator icing then dip into the sprinkles to cover top completely.
2 Using the decorator icing, glue the small sprinkle covered cookie, sprinkle side up, to the top of the large marshmallow.
3 Frost the round sugar cookie with the cookie icing then while still wet carefully press large marshmallow into center of cookie.
4 Cut a slit into the side of the large marshmallow and stick a lifesaver in for the handle (if it doesn’t stick, add a little decorator icing to the slit).
Ice Cream Cone Teacup
My group of Young Women at church wanted to have a Tea Party so last night we had a Tea Party for our activity. I made them some treats to go along with the theme so here is the first of two edible tea cups that I made for them. I found the idea on a blog called “Accent the Party”.
for each teacup you will need:
cup style wafer ice cream cone
round sugar or shortbread cookie (I shopped at Winco and bought a package of their Hy-Top brand sugar cookies which the girls said tasted pretty good)
decorator’s icing (I had and so used a tube of Betty Crocker white decorator icing)
2 – 3 gummy ring candies (I bought a bag of peach rings)
assorted candies, popcorn or trail mix to fill the teacup (I just filled them with the peach rings)
1 Use a serrated knife to carefully cut the cup portion of the ice cream cone from the handle. Discard the handle and set the cup aside for now. (Don’t cut the cup right at the intersecting line of cup and handle, cut down around the first or second line on the handle, you need a little extra in order to put this thing together.)
2 Place a gummy ring candy on the center of the cookie, using decorator icing to glue it in place.
3 Set the ice cream cone cup on top of the gummy ring. Again, use a thin line of decorator icing to hold the cone in place. (I couldn’t get this to hold so after I did this step then I glued another gummy ring candy on the inside of the cup to give it a little more strength and then the cup finally stayed in place.)
4 For a teacup handle, slice a gummy ring in half. Gently press the cut ends of one of the candy halves against the cone to stick the handle in place. (I had to use icing on the ends to get it to stick.)
5 Fill the cup with a few candies or other snacks.
Cafe Rio Sweet Pork
My husband and my son love Cafe Rio Sweet Pork Burritos so when I saw this recipe I knew I had to give it a try ASAP! I have never had Cafe Rio’s version but Bob and Zach said that this was pretty close and also delicious. It comes from a blog called “One Good Thing”.
2 pounds pork (she uses pork butt, I had half of a pork loin in the freezer so that’s what I used)
2 cans Coke (not Diet Coke)
1/2 cup brown sugar
1/2 teaspoon garlic salt
1/4 cup water
1 can diced green chiles
3/4 can enchilada sauce
1 cup brown sugar
1 Put pork in resealable bag to marinate, pour in 1 can of Coke and 1/2 cup brown sugar. Marinate for a few hours or overnight.
2 Drain marinade and put pork, 1/2 can Coke, water and garlic in crock pot on high for about 3 – 4 hours. Remove pork from crock pot, drain off liquid and shred pork. (She uses 2 forks but I learned this great tip at the Taste of Home Cooking School which I tried for the first time here. You just put the pork butt or loin in the bowl of your mixer and with your paddle attachment just turn it on and let it go, it shreds the pork perfectly and quickly!)
3 Mix together in bowl or blender remaining 1/2 can of Coke, can of chiles, enchilada sauce and 1 cup brown sugar.
4 Put shredded pork back in crock pot and pour sauce over the top then heat just until warmed through.
Sugar Crusted Vanilla French Toast
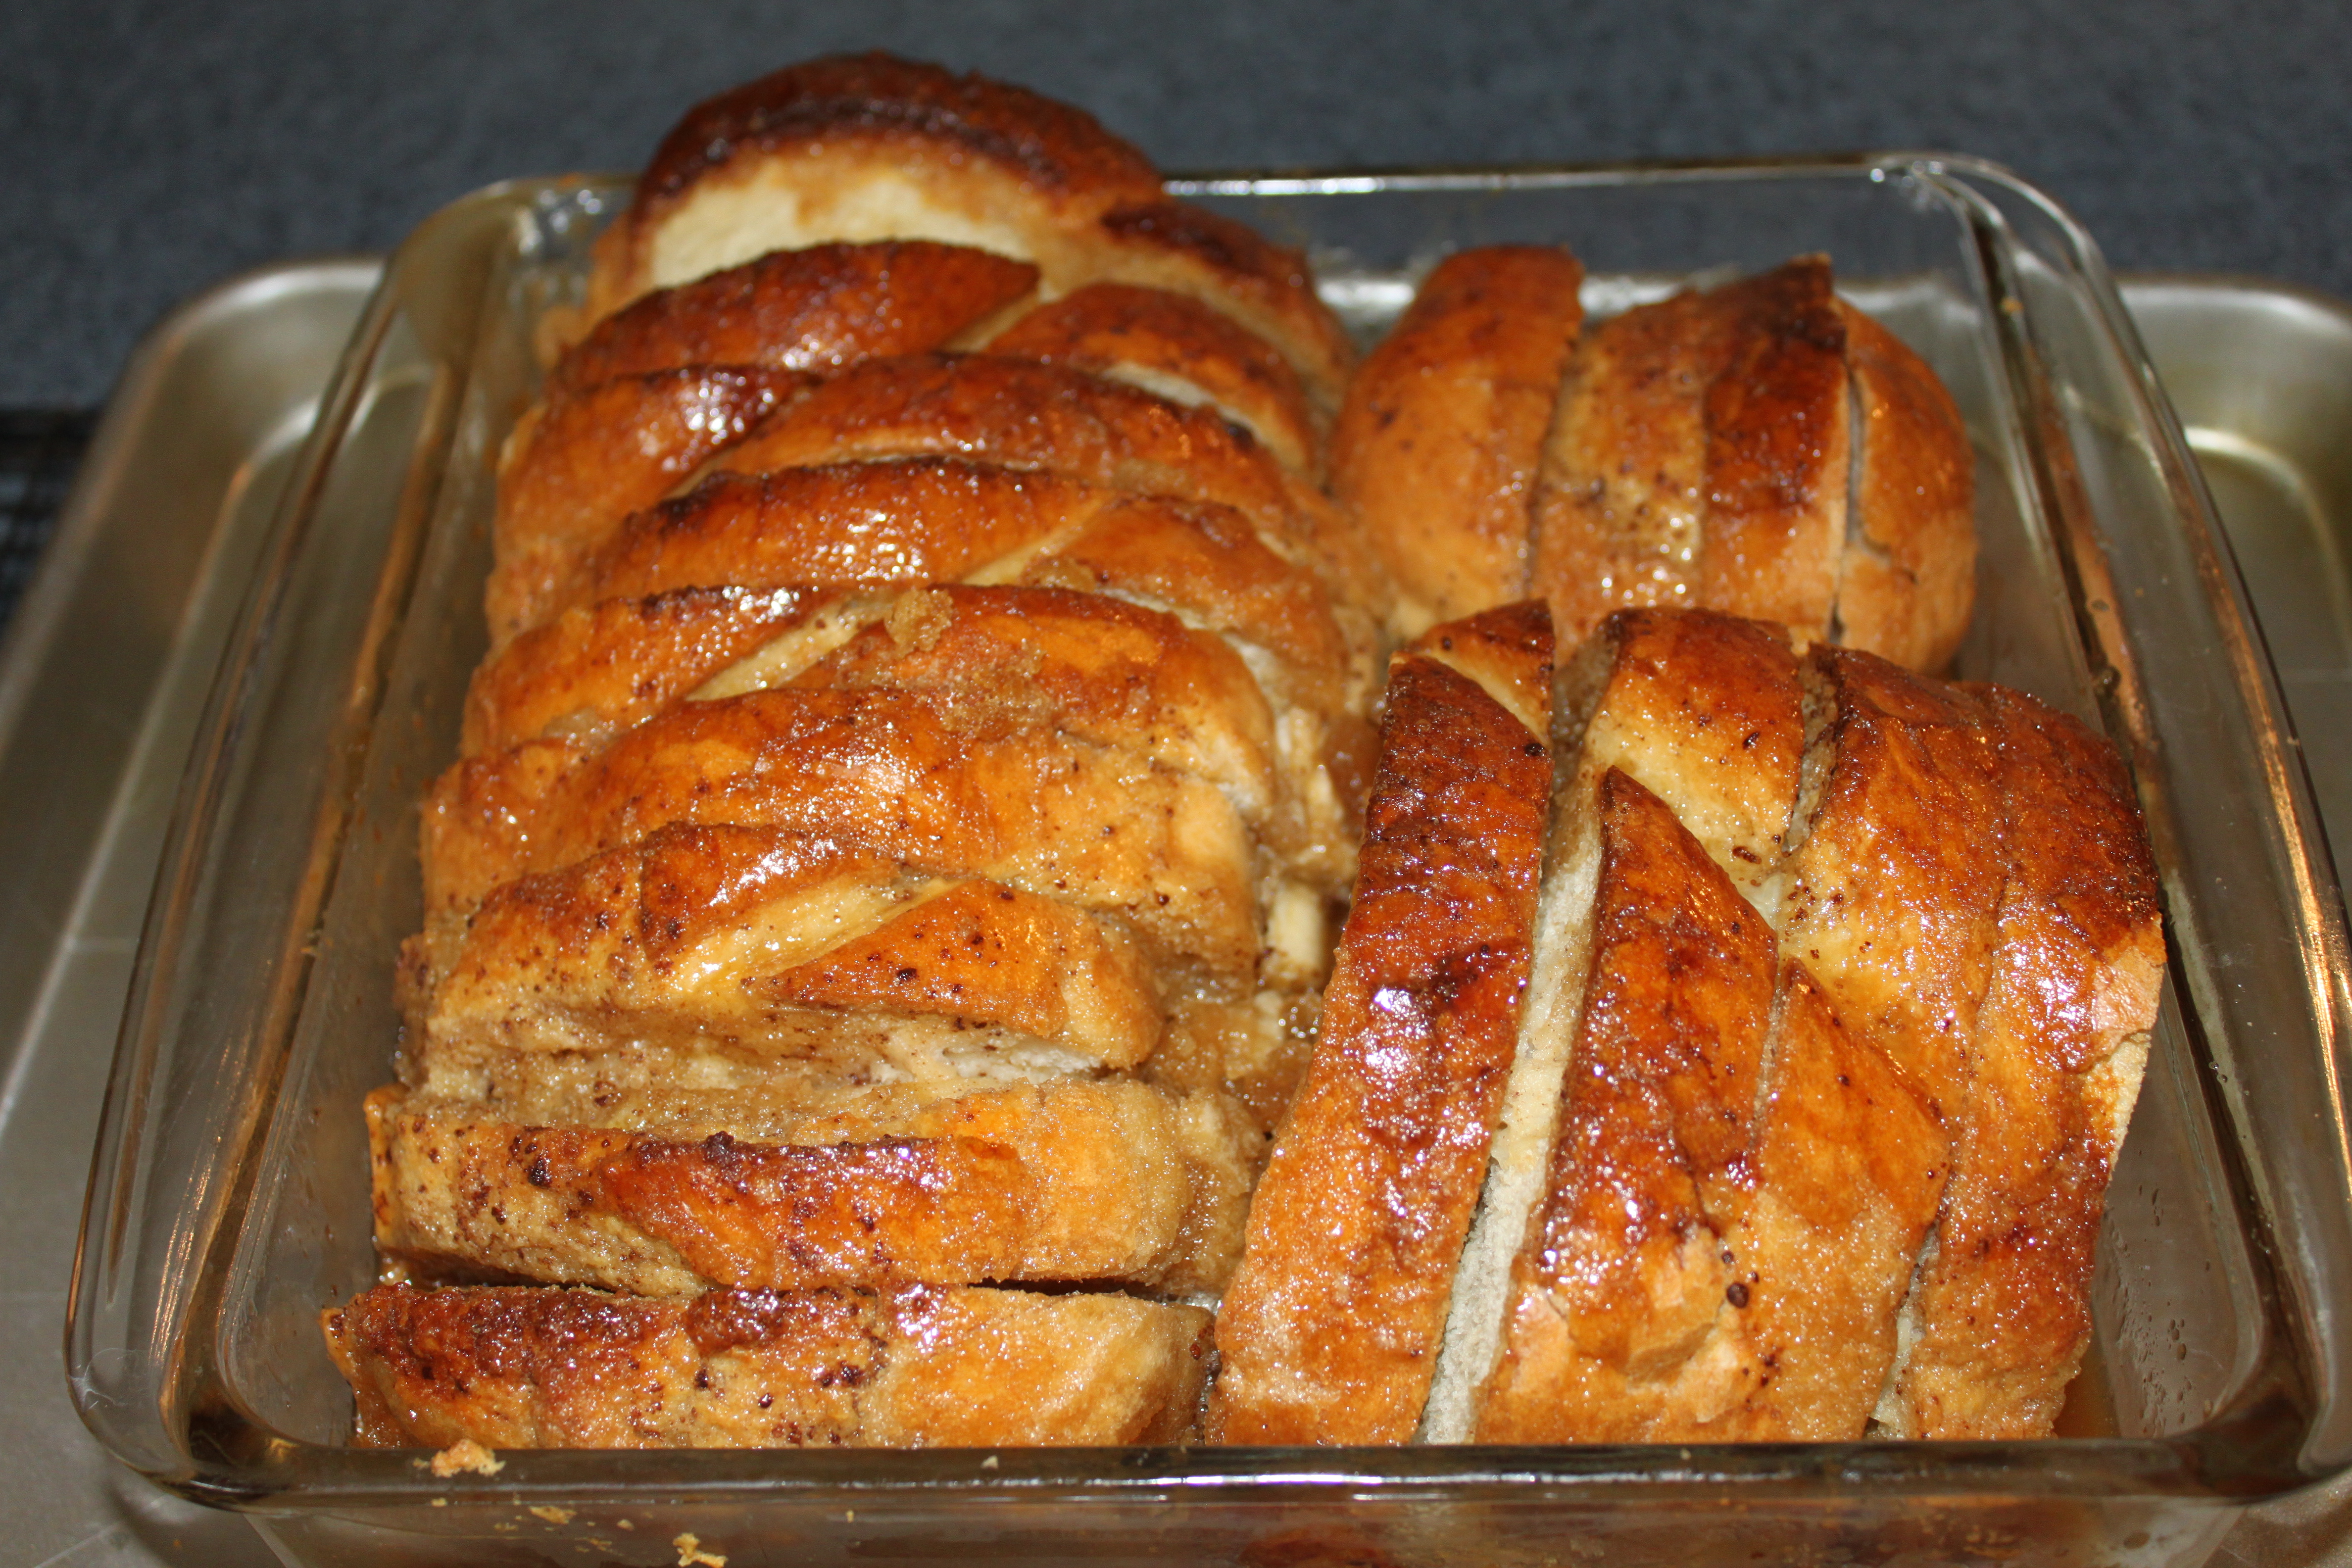
Doesn’t that look gorgeous and delicious! It was delicious and didn’t need any additional toppings like butter or syrup, it was good to go right out of the pan. I found this recipe on Pinterest from a blog called “Phemomenon”. I highly recommend that you try it right away!
1 smallish baguette or crusty loaf of bread, cut into 1″ slices (about 1 pound loaf) (I bought a loaf of French bread in the Winco bakery)
custard:
3 eggs
1/2 cup milk
1/3 cup heavy cream
2 teaspoons vanilla
1/4 teaspoon cinnamon
pinch of sea salt
sugar coating:
1/2 cup (1 stick) unsalted butter
3/4 cup packed dark brown sugar
2 tablespoons light corn syrup
1 teaspoon vanilla
1 Day Ahead:
1 Butter 9 x9″ pan. Place bread slices, standing up, in pan. Set aside while preparing custard.
2 In a large measuring cup or pitcher, whisk together eggs, milk, cream, vanilla and salt until well combined. Pour mixture evenly over all bread slices in pan. (Make sure it gets down between slices as well, I used one hand to pour and with my other hand, I used a knife to separate the slices so that they all got covered.) Cover pan tightly with plastic wrap and refrigerate overnight.
Next Morning:
3 Preheat oven to 350. Remove casserole from fridge and set on baking sheet.
4 In large microwave bowl or large glass measuring cup, melt butter in microwave just until melted (about 1 – 1 1/2 minutes on high). Add brown sugar and corn syrup, whisk well to combine. Microwave on high again in 30 second bursts (2 – 3 times should be enough) until sugar is melted and mixture is bubbly and hot. Gently whisk in vanilla. (You can also do this on the stove top.)
5 Carefully and evenly pour sugar mixture over casserole, covering each slice well. (I did the same pour and separate with a knife thing here as well.) Place casserole, on baking sheet, in oven and bake until puffy all across pan like a good bread pudding and is golden and baked through, about 40 -45 minutes depending on how packed your pan is. The casserole will deflate as it cools. Serve warm with mixed berries.
Cincinnati Bengals Helmet and Football Birthday Fondant Cakes
Yesterday was my future son in law Jaren’s birthday so Courtney and I made him a couple of football themed birthday cakes, one for our house and one for his house. I found both a football shaped pan and a helmet shaped pan at Michaels (what would we do without Michaels?). The cakes are both “White Almond Sour Cream” cakes only without the almond but with a double shot of vanilla then iced of course with my favorite buttercream icing. The football is covered with Pettinice chocolate fondant from Funfinity and the helmet is covered with Duff’s fondant in orange and black also purchased at Michaels. I think they came out great! Cort does such an awesome job with the embellishments. Happy Birthday Jaren!
Pink Ribbon Birthday Present Chocolate Fondant Cake
Here is a birthday cake that Courtney and I made for our cute friend Jana. It is two 8″ square layers of chocolate cake from the “White Almond Sour Cream” cake recipe, covered with my favorite vanilla buttercream icing and then wrapped in Pettinice Chocolate fondant and decorated with a giant pink bow made from Duff’s fondant. Cort made the bow from loops of fondant that we let dry overnight. Happy Birthday Jana!
2012 in review
The WordPress.com stats helper monkeys prepared a 2012 annual report for this blog.
Here’s an excerpt:
4,329 films were submitted to the 2012 Cannes Film Festival. This blog had 41,000 views in 2012. If each view were a film, this blog would power 9 Film Festivals
Strawberry Pretzel Salad
I don’t know why this is called a salad because it is really more of a dessert but that is absolutely not a complaint as I love to have something sweet with a meal or before a meal or after a meal or in between meals (yes, I have a small sweet tooth problem!). This recipe is from Paula Deen’s website and it was so very good that I had to go get a piece to eat before I blogged about it!
3 tablespoons sugar
3/4 cup melted butter
2 cups crushed pretzels
1 (8 ounce) package cream cheese
3/4 cup sugar
1 (8 ounce) container Cool Whip, thawed plus more for topping if desired
2 (3 ounce each) packages strawberry jello
2 cups boiling water
2 (10 ounce each) packages frozen strawberries
1 (8 ounce) can crushed pineapple (not drained)
1 Preheat oven to 400.
2 For the crust, mix together 3 tablespoons of sugar, butter and pretzels. Press mixture into a 9 x 13″ pan (it didn’t say to grease the pan but I gave it a brief spray of Pam just to be safe) and bake for 7 minutes. Set aside and allow to cool. (A note from me, when I make this again, I will double the crust ingredients to make it thicker, it was really thin and barely covered the bottom of the pan.)
3 In a mixing bowl, beat together the cream cheese and 3/4 cup sugar. Fold in Cool Whip and spread over cooled crust. Refrigerate until well chilled.
4 In a small bowl, dissolve the jello in the boiling water and allow to cool slightly. Add strawberries and pineapple and pour carefully over cream cheese mixture. Refrigerate until set.
5 To serve, cut into slices and top with a dollop of Cool Whip.


