Chocolate Keys

Chocolate Keys

This week was our Evening In Excellence or Young Women in Excellence which is our year end wrap up for the girls at church.  Our theme for the year centered around various keys that we all need in life to make us happier and better people so I made the girls some chocolate keys.  I found the mold at Gygis and the chocolate as well but you could just use Wilton candy melts which you can find at Michaels.  I piped the white chocolate in first and let it sit in the fridge for about 10 – 15 minutes and then spooned in the milk chocolate and let that sit in the fridge for about 15 – 20 minutes.  Super easy and really cute!

Leftover Halloween Candy Cake Mix Bars

Leftover Halloween Candy Cake Mix Bars

This is one of my all time favorite recipes, my go to recipe for when I need a quick treat.  It is already on the blog several times with several different variations but I decided to put it on once again with yet another variation.  I bought the big bag of candy at Costco, you know the one, the one with like 150 pieces of chocolate candies like Kit Kats, Snickers, Milky Way, Twix, M&M’s, Reeses Peanut Butter Cups, Peanut M&M’s, Almond Joy, Crunch, etc and we had about 50 trick or treaters, if we were lucky, so I have this huge bowl of candy sitting on the counter that no one here needs to be eating!  So I made bar cookies with some of it to try and alleviate the problem.  This recipe comes from Stephanie Ashcraft’s “101 Things to do with a Cake Mix” and also her “101 More Things to do with a Cake Mix”, both of which I highly recommend.

1 cake mix, your choice of flavor (I went with yellow for these)

2 eggs

1/3 cup oil

1 – 2 cups mix-ins of your choice (I chopped up all the little candy bars until I had about 1 1/2 cups)

Mix cake mix, eggs and oil until combined, batter will be thick.  Stir in mix-ins.  Lightly grease a 9 x 13″ pan, bottom only and press dough into pan.  Bake at 350 for about 15 minutes.  DONE!

Baked Cake Doughnuts

Baked Cake Doughnuts

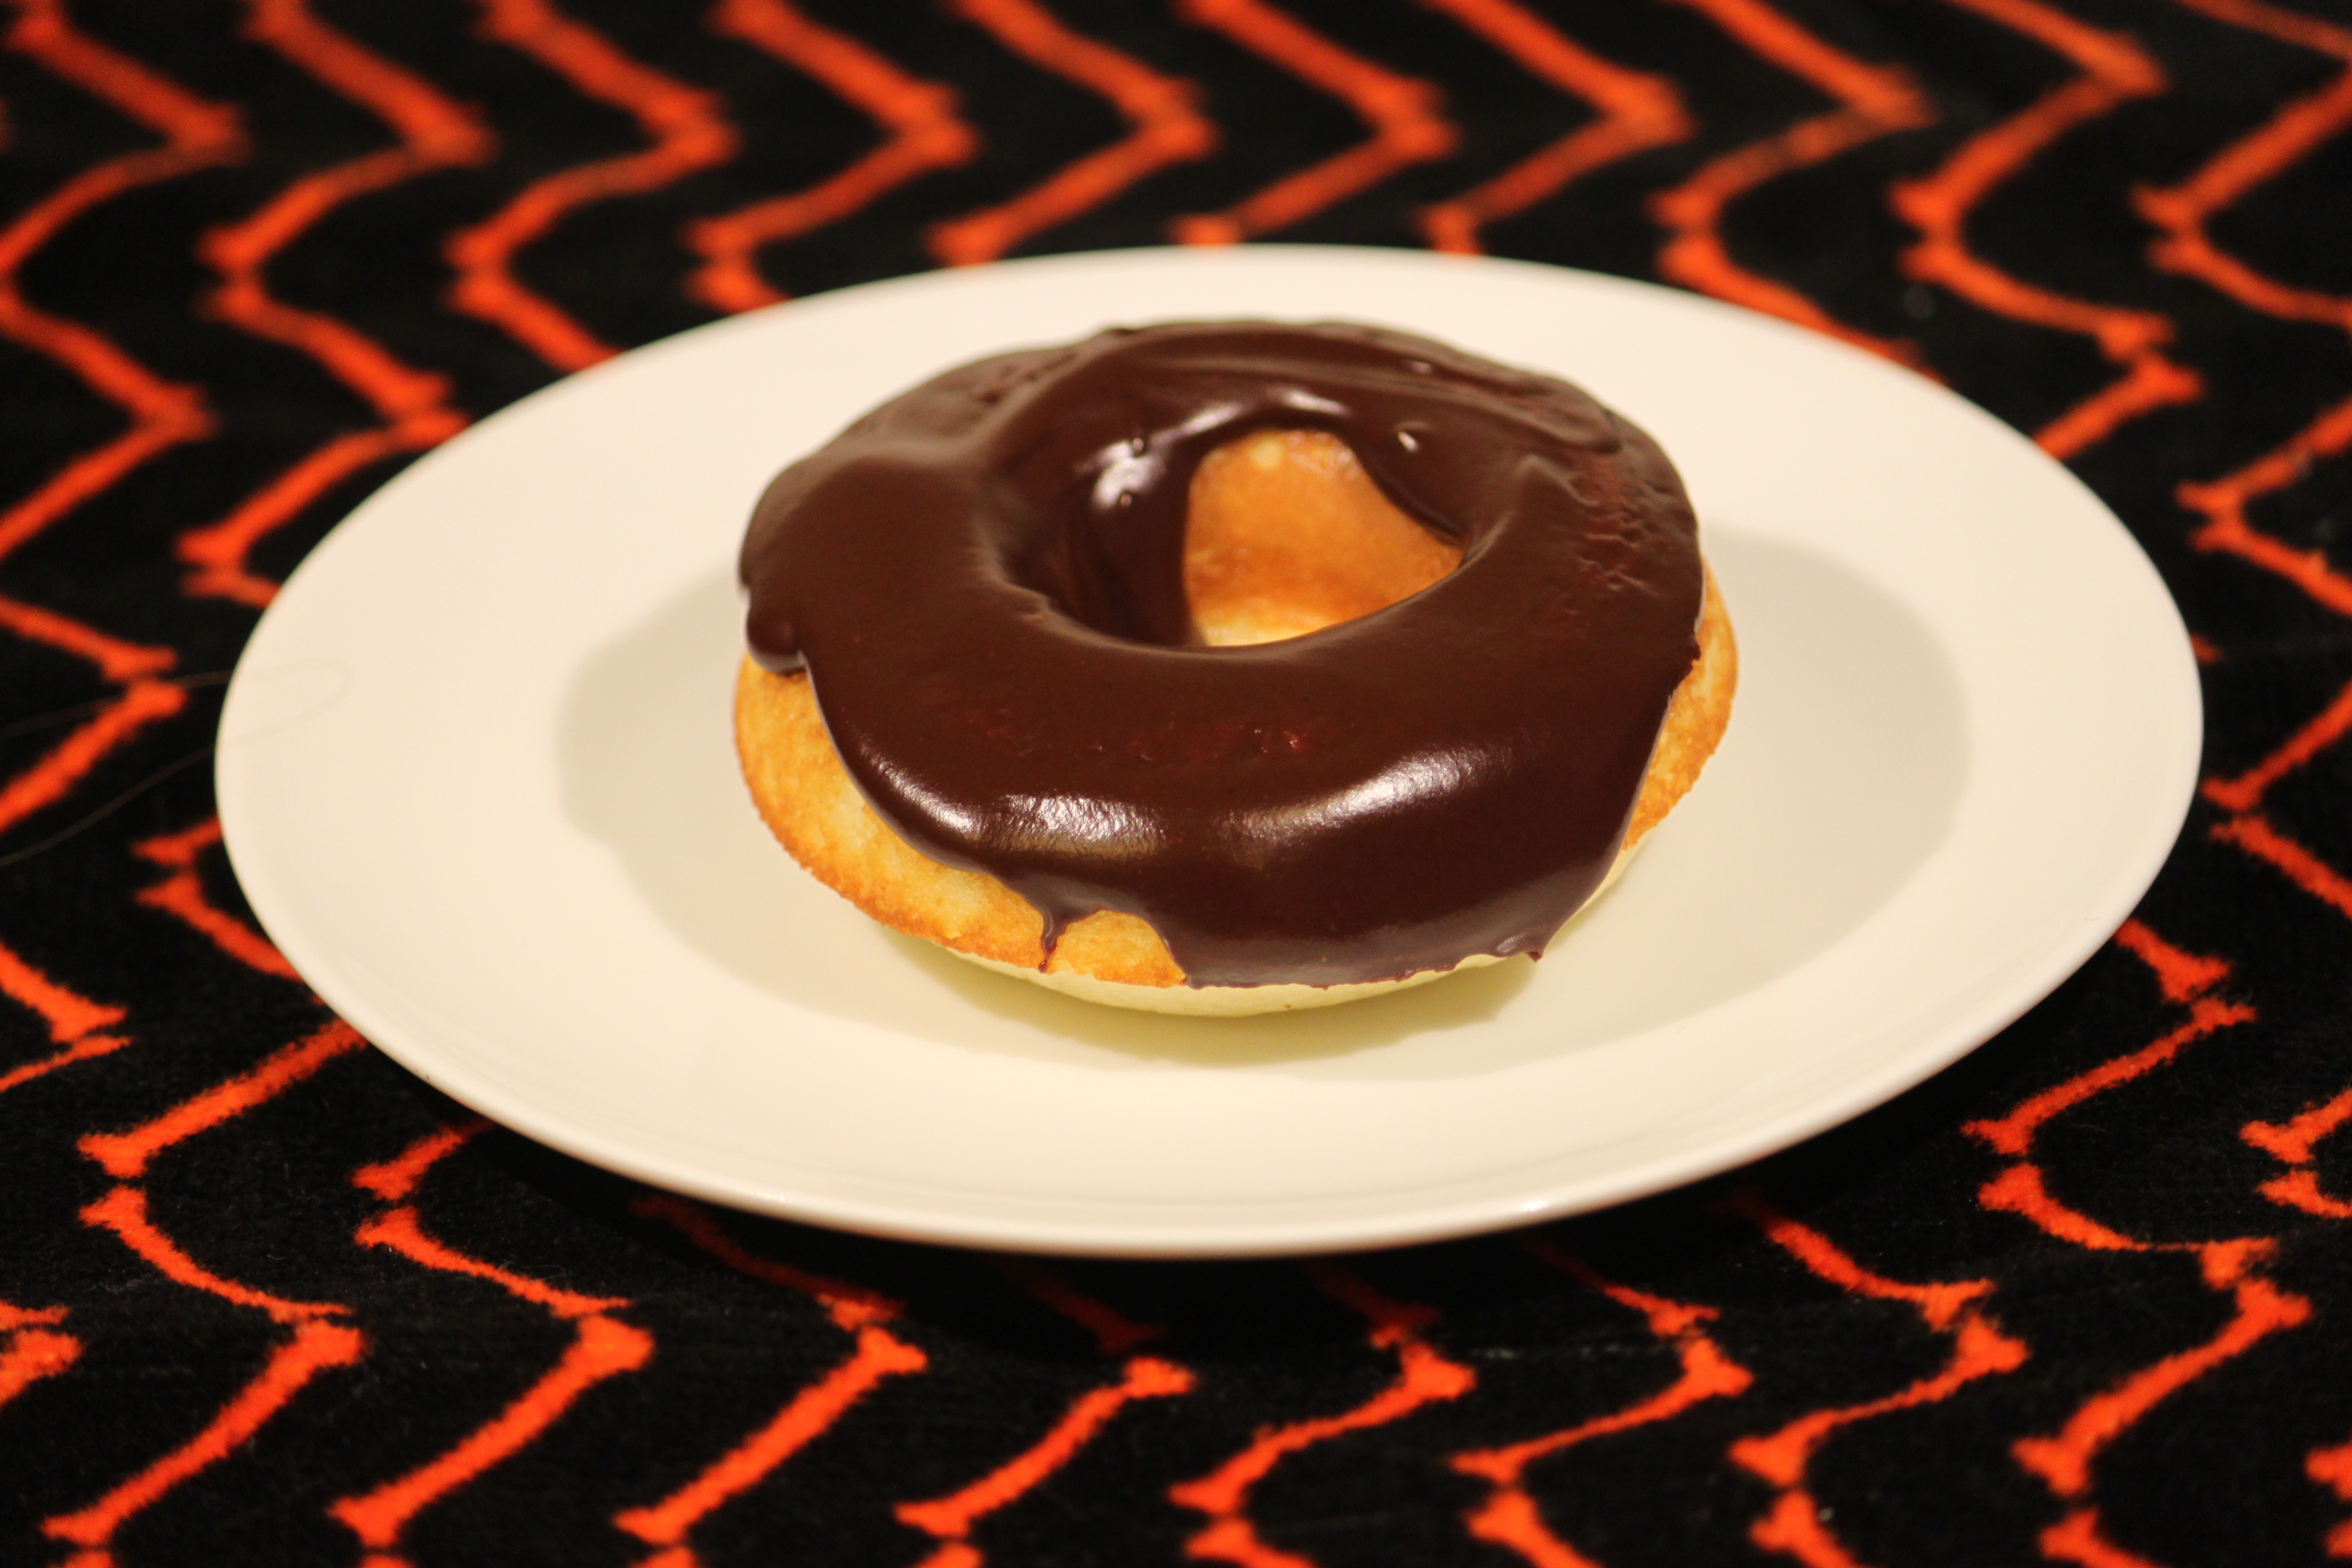
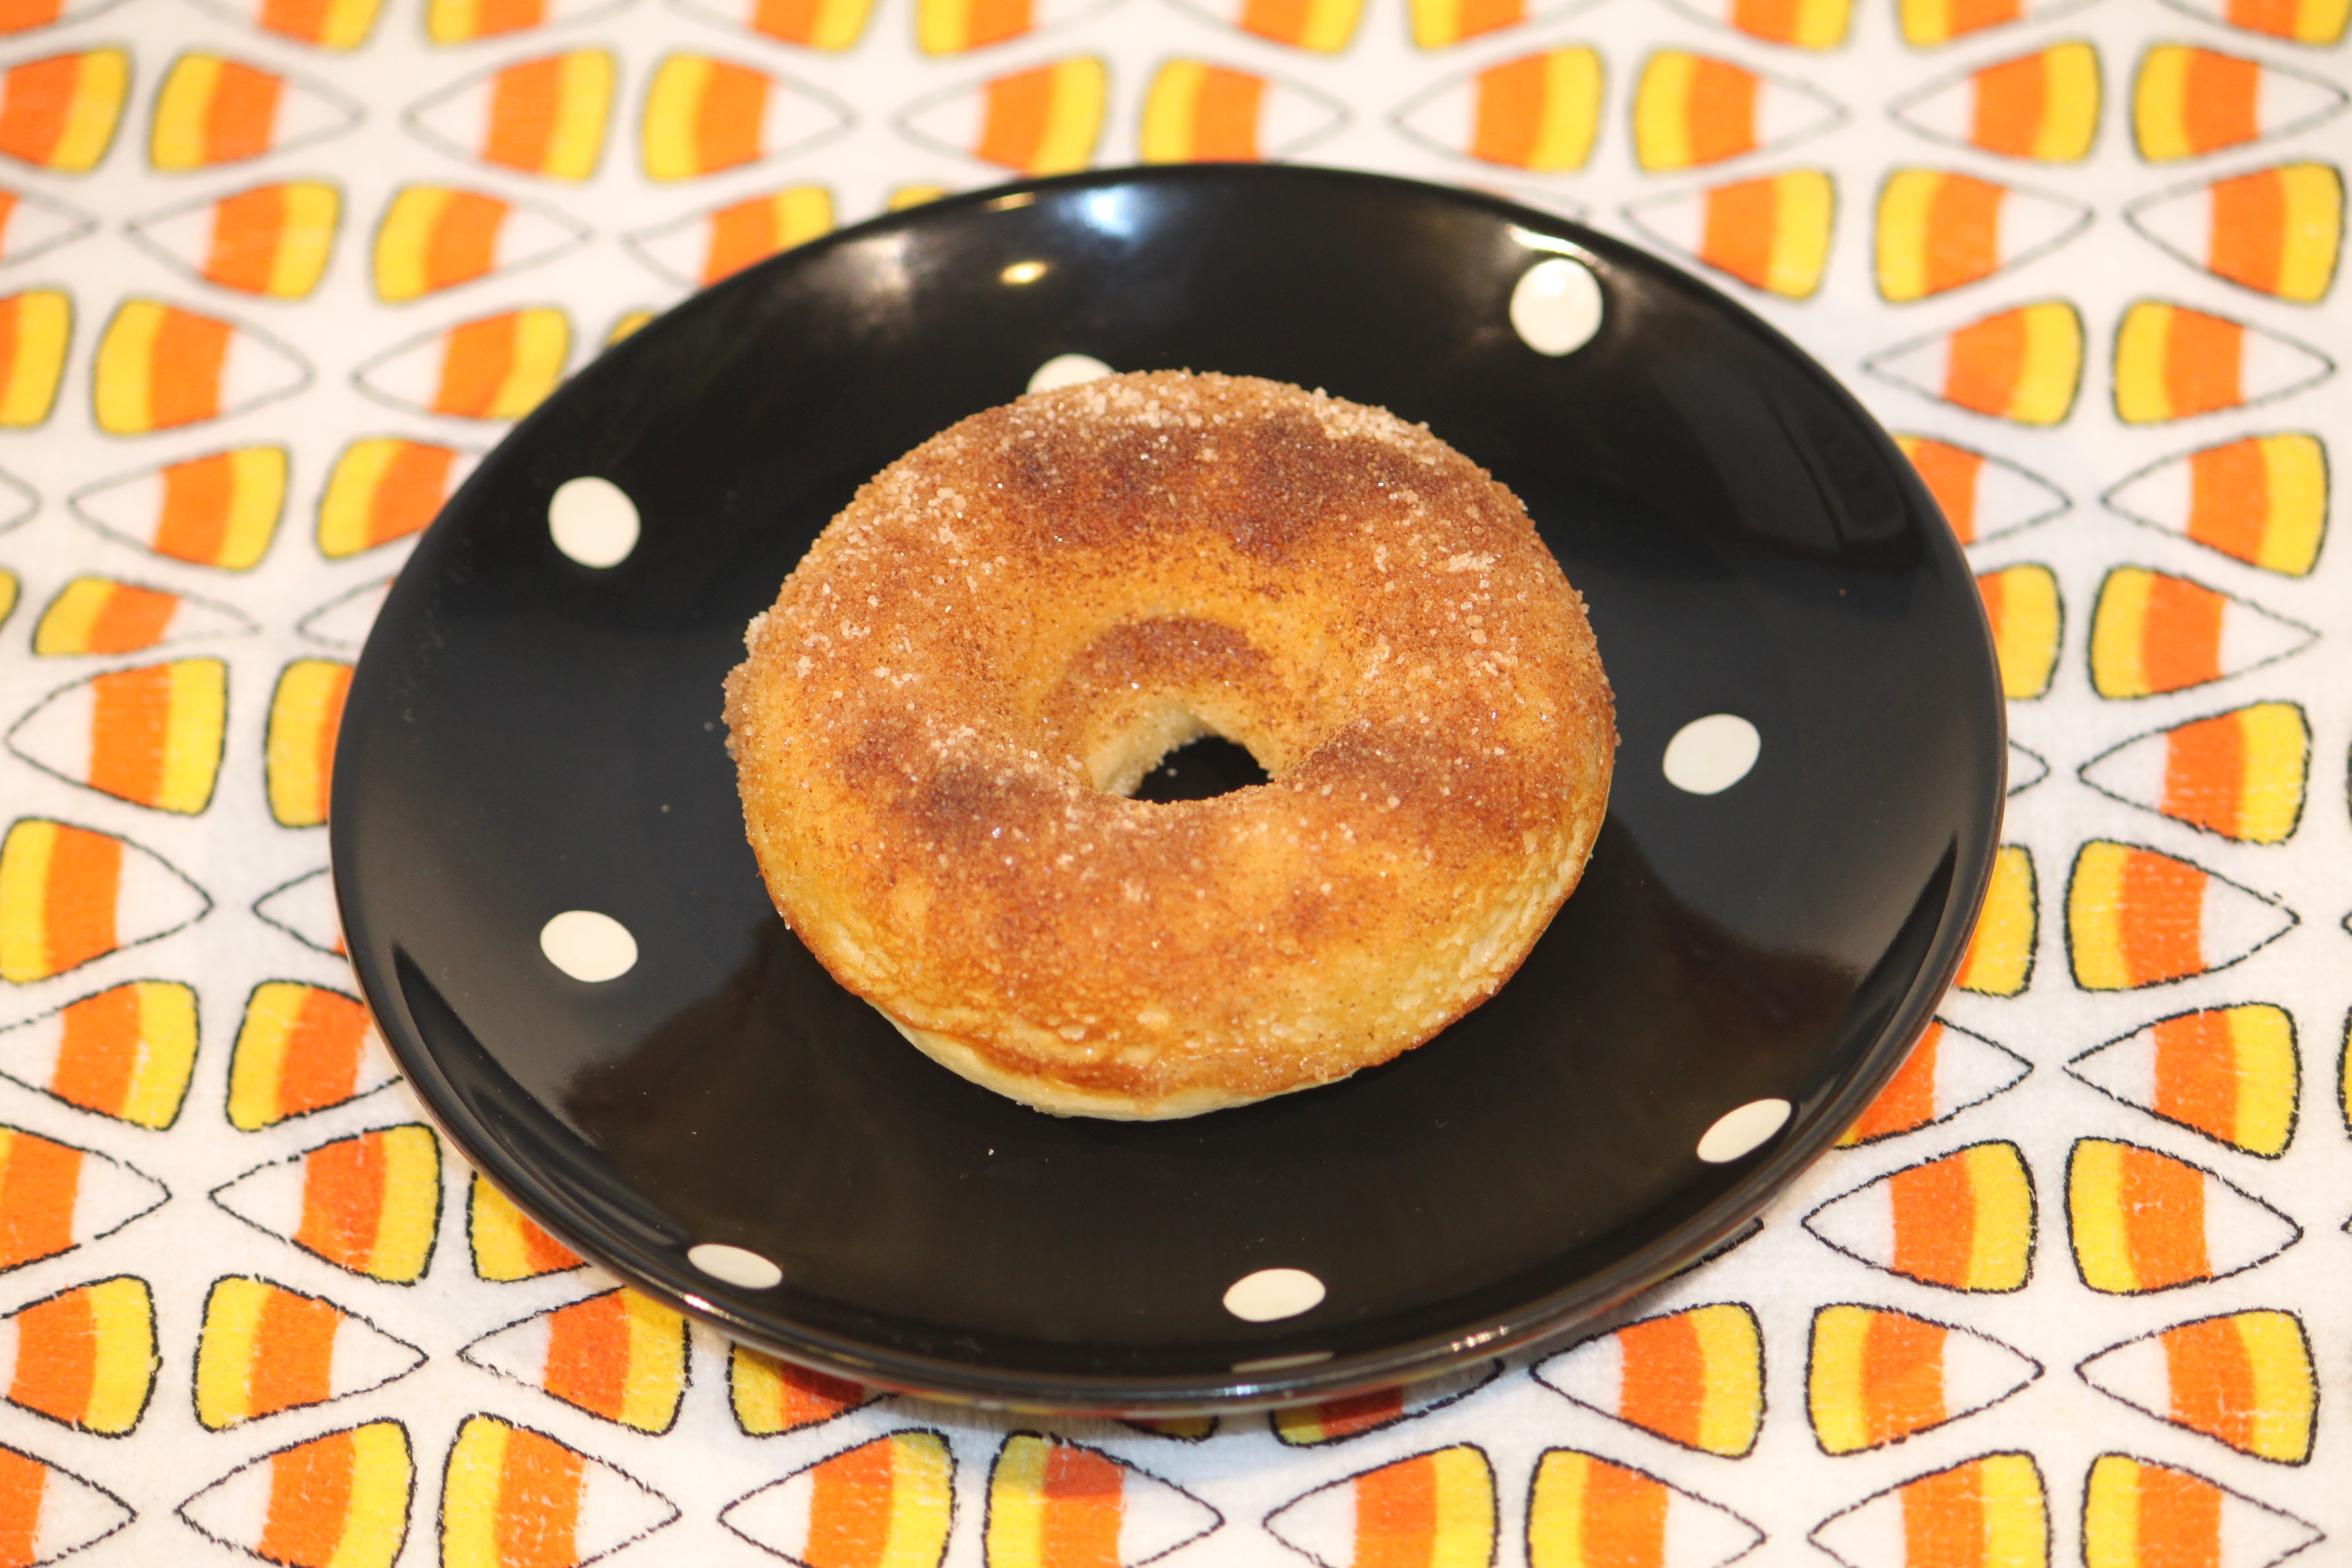
What better night to have homemade doughnuts than Halloween?  I wanted to try making some homemade baked doughnuts so I bought a Wilton doughnut pan at Michaels and this is the recipe that came with the pan.  They were surprisingly good!  I made the chocolate glazed and some cinnamon sugar as well and I think I preferred the cinnamon sugar.  The recipe said it made about 12 doughnuts but I ended up with 17.  I need to get another pan though because it only makes 6 at a time.

2 cups cake flour, sifted (if you don’t have cake flour, measure out 1 cup flour and then remove 2 tablespoons from the cup and that will equal 1 cup cake flour)

3/4 cup sugar

2 teaspoons baking powder

1/4 teaspoon nutmeg (I left this out)

1 teaspoon salt

3/4 cup buttermilk (make your own by adding 1 teaspoon lemon juice or vinegar to 1 cup milk)

2 eggs, lightly beaten

2 tablespoons butter, melted

1  Preheat oven to 425.  Spray pan with nonstick cooking spray.

2  In mixing bowl, sift together flour, sugar, baking powder, nutmeg and salt.  Add buttermilk, eggs and butter.  Beat until just combined.  Fill each doughnut cup about 2/3 full.  (I put the batter in a large ziploc bag, cut the corner off the bag and then piped the batter into the doughnut pan.)

3  Bake 7 – 9 minutes or until top of doughnut springs back when touched.  Let cool in pan 4 – 5 minutes before removing.  Finish doughnuts with chocolate glaze, cinnamon sugar or powdered sugar.

Toppings

Chocolate Glaze

1/2 cup semisweet chocolate chips

2 tablespoons butter

2 tablespoons corn syrup

1 – 2 teaspoons hot water

In medium bowl, microwave chips, butter and corn syrup on 50% power for 1 minute then stir until completely melted.  Stir in 1 teaspoon hot water, until glaze is thick and smooth.  Add more hot water if glaze is too thick.  (I made 1 1/2 times this glaze and it covered 12 of the doughnuts.  Also I put this glaze in a ziploc bag too and cut off the corner so I could pipe it onto the doughnuts.)

Cinnamon Sugar

2 tablespoons sugar

1 tablespoon cinnamon

2 tablespoons butter, melted

In shallow bowl, stir together cinnamon and sugar.  Dip doughnut in butter and then roll in cinnamon sugar.

Powdered Sugar

Put 2/3 cup powdered sugar in a resealable bag, add doughnut, close bag and shake to coat.

Baked Cake Doughnuts

Kool-Aid Popcorn

Cherry Kool-Aid Popcorn

Last night at church we met together both the Young Men and the Young Women for our activity and they asked me to make some refreshments.  I found this recipe awhile ago and pinned it for just this occasion.  It comes from the “Tasty Kitchen” website and while it isn’t a difficult recipe to make, it is time consuming, especially when you are making four batches.  I made cherry, grape, berry and lemon and, surprisingly, I thought the lemon tasted the best although the kids ate almost all of the other three.  I found popcorn treat bags at the dollar store for serving so I just set the bowls up buffet style with scoops and let them have at it.  You could have a lot of fun with recipe, matching the color to whatever event is taking place.

2 cups sugar

1 cup light corn syrup

2/3 cup butter

6 quarts plain popped popcorn

2 packages Kool-Aid, any flavor

1 teaspoon baking soda

1  Preheat oven to 225.

2  Boil sugar, syrup and butter together for 3 minutes.

3  In a large, shallow ungreased (I greased mine and it was fine) baking dish (I used a large cake pan, about 18′ x 24″ is my guess), spread out popped popcorn.

4  In a small bowl, combine Kool-Aid with baking soda.

5  Remove sugar syrup from heat and carefully stir in Kool-Aid mixture, this will make the sugar mixture puff up so be careful not to get burned.

6  Now take sugar mixture and pour it over the popcorn.  Carefully mix it until it is all combined.

7  Place it in the oven and stir every 10 minutes, repeating 3 times.

8  Take popcorn out of oven and let cool, then break into pieces (I put it into a greased bowl straight out of the oven and let it cool there then put it in a large brown paper grocery sack to break it up and then back into the bowl for serving.)

Here are the other flavors (cherry is pictured above):

Berry Kool-Aid Popcorn

this is the berry and here is the lemon (my phone died right as I was taking a picture of the grape so no grape!):

Lemon Kool-Aid Popcorn

“Orange” You Glad It’s Your Birthday?

Orange you glad it's your birthday?

Another little handy birthday gift idea for you all, the “Orange” you glad it’s your birthday? gift!  Super easy and cute, found it on Pinterest (of course!) from a blog called “My Pookie Designs”.  People are so creative!  I’m not creative enough to come up with the idea but I can run with it after I’ve found it.  Yesterday was one of my cute little Young Women’s birthday so she got this little guy for her bday.  Here’s a look at what was inside:

Orange you glad it's your birthday?

The little orange french fry container from the “Pick Your Plum” website and then some orange stuff – Tic Tacs, nail polish, flower shaped post its, a pen, some Trident gum, Reeses Peanut Butter cups and a couple of gum balls.  Add a little sign to it saying “Orange” you glad it’s your birthday? and you’re done!  Happy Birthday Mayli!

Pretzel Broomsticks and Oreo Witch Hats

Pretzel Broomsticks and Oreo Witch Hats

These are my favorite set of treats from treat days!  I found this kit at Michaels and couldn’t resist.  The kit came with everything you need to make these guys and said it was exclusive to Michaels.  The broomsticks are made just like the mummies, by pouring the melted chocolate in the mold, setting in a pretzel and the letting it sit in the fridge.  The candy bug gets attached with some melted chocolate after it is set and comes out of the fridge.  The hat is made by pouring the melted chocolate in the mold and then setting an Oreo on top and then letting set in the fridge.  The little star gets attached with melted chocolate after it is set as well.  So cute!  If you’re looking for a cute and easy last minute treat idea, head on over to Michaels and look for this kit.  It only came with a small amount of chocolate, maybe enough to make 4 each, but I just bought extra bags so that I could make more.  Happy Halloween!

Zombie Eyeballs

Zombie Eyeballs

Another Halloween treat from my treat making days!  These “Zombie Eyeballs” come from a blog called “eighteen25” and couldn’t be any easier to make.

1 bag square waffle pretzels

1 bag Wilton lime green candy melts

1 bag M&M’s

red sprinkles (I couldn’t find any red sprinkles so I used red decorating sugar instead)

black icing (I couldn’t get the black icing to work very well so I used mini chocolate chips instead)

1  Lay pretzels out on a cookie sheet.  (I lined my cookie sheet with parchment paper for easy cleanup.)

2  Place 1 candy melt on top of each pretzel.

3  Bake at 250 for about 4 minutes.  Remove cookie sheet from oven and sprinkle with red sugar or sprinkles for bloodshot eyes.  Then add an M&M with M side down.  Add a black icing dot (or a mini choc chip) in center of each M&M for pupil.

4  Let set for about an hour to harden.

Pretzel Mummies

Pretzel Mummies

Friday and Saturday ended up being Halloween treat days around here, meaning I had a lot of fun!  Here is treat #1 from the treat making days – Pretzel Mummies.  I found this mold at Michaels, the pretzel rods at Winco and the Wilton candy melts at Michaels also.  Super easy to make.  Melt the candy melts in the microwave according to package directions.  I took a toothpick and “painted” the eyes in with milk chocolate then placed the tray in the fridge for just a few minutes until they were set and then spooned in the white chocolate until each mold was not quite full and then added the pretzel.  Then back into the fridge for about 10 – 15 minutes until they were set.  Popped them out and put them in a pretzel bag (also found at Michaels).  Simple and cute!  Happy Halloween!

Candy Corn M&M Fudge Brownies

Candy Corn M&M Fudge Brownies

So these are like a brownie topped with fudge, win, win!  The recipe comes from a blog called “Inside BruCrew Life” and if you like fudge and brownies, you should definitely give them a try.  It was my friend Belinda’s birthday yesterday and these were for her, Happy Birthday Belinda!

1 brownie mix (for 9 x 13″ pan) plus ingredients to make brownies

3 cups white chocolate chips

1 (14 oz) can sweetened condensed milk

1 cup marshmallow cream

orange and yellow gel food coloring

candy corn M&M’s

1  Bake brownies according to package directions and let cool completely.

2  In a large saucepan, combine chips and milk over low heat and stir until melted and creamy.  Add marshmallow and stir until creamy again.  Divide mixture into 3 bowls.

3  Color 1 bowl yellow, 1 bowl orange and leave 1 bowl white.  (If mixture starts to thicken, put in microwave for 20 – 30 seconds.)  After 2 bowls are colored, place all 3 bowls in microwave for 20 – 30 seconds and stir.  Quickly drop spoonfuls of each color over top of cooled brownies.  When finished, take a knife and swirl colors by pulling knife through topping carefully in a random pattern.  Do not swirl too much or colors will start to go together.

4  Chill in refrigerator for 2 hours.  Remove and score top of brownies into squares with knife and then top each square with an M&M.  Let set another 2 hours before cutting all the way through.

“Blow Them Away” Gifts

Blow Them Away Gifts

Several of the girls from church have events this week such as a huge soccer game, a huge cross country meet and a huge concert and I wanted to let them know that I was thinking about them since I won’t be able to make it to most of these things so I checked out Pinterest and found this cute idea for a gift of encouragement and/or good luck.  I can’t give you a link to the original idea because it is one of those pins that is just a picture so here is the link to the picture so you can see the original idea, basically it’s a little gift full of things that blow!  🙂  Here is a closer look at what’s inside which I found all at the Dollar Store:

Blow Them Away Gifts

I started with a cute little white french fry container that I got from the Pick Your Plum website which has awesome daily deals and then from the dollar store I got Dubble Bubble gum balls, Charms Blow Pops, a butterfly party blower, a mini bottle of bubbles, a mini plastic harmonica and a mini plastic horn.  Then I just added a little sign on the front of the fry container, “Blow” the other team away! for the soccer game, “Blow” the competition away! for the cross country meet and You’re going to “Blow” them away! for the concert.  So cute and versatile!  Wishing all my girls lots of luck this week!